 |
 |
Please Note: These installation instructions are preliminary. Please double check the instructions and report any errors.
Once you've completed the construction of Blundar's Easy RTP board you must make some minor modifications to your ECU so the RTP features may be used. These hardware mods require good soldering skills and a few parts obtainable at any electronics supply store.
In these examples the install is being completed on a P28 OBD1 ECU but they should be no different for any OBD1 board.
*For JDM P30-900 mose likely other jdm ecu's see below for correct pins for the surface mount chips
Parts: With this installation we will be severing a trace on the ECU to interrupt the WE signal from the CPU. Soldering this trace back together, although not impossible would be very difficult so by using a removable plug to connect the RTP board we can build a small jumper plug to install when the RTP board is not installed.
- Here you can see the plugs I used on the RTP board. If you look really closely you can see the severed trace in the background. A better choice here would be to use a header on the RTP board that comes out at a 90 degree angle. This would give more clearance to close the ECU case:
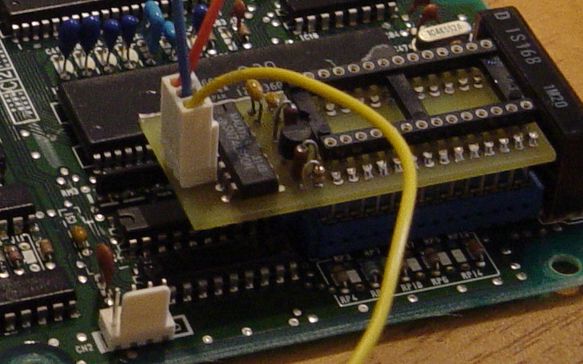
I recommend using small gauge wires for the plug as the spots for soldering these wires are fairly small. Wire-wrap would probably be ideal. Do as I say not as I do - I've been soldering for years.
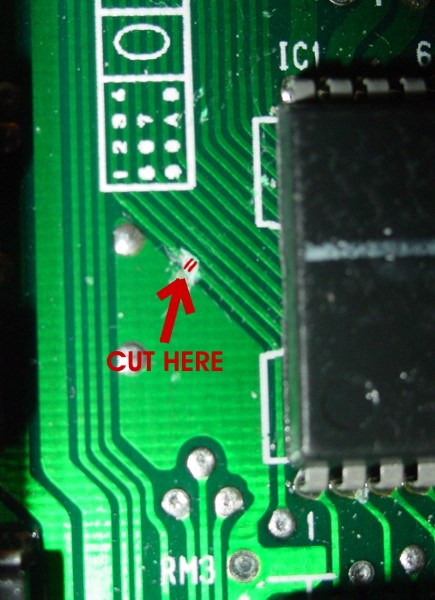
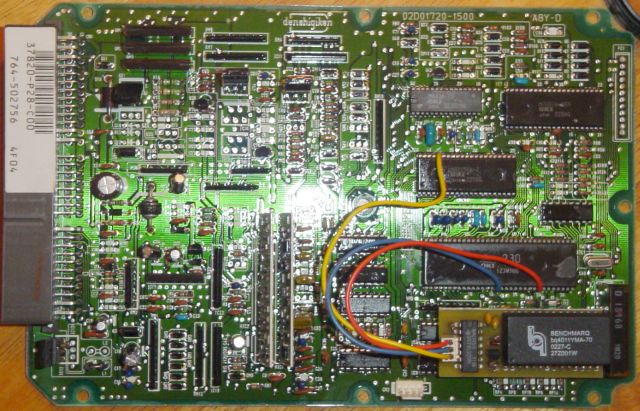
- The next step is to sever the WE connection from the MCU. Thanks to doc for providing the following picture from his install.
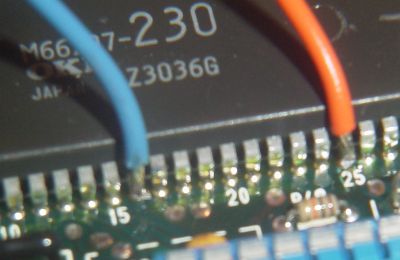
- Now we solder the wires from the RTP board to their respective pins on the chips. Far easier than trying to solder to a trace on the board. The A15 line on the MCU is used to address the writable image in the ROM. It is otherwise unused so we simply solder the A15 wire to P16 on the MCU. Thanks to Denshigiken/IPT for screening on pin numbers for us. It works best if you tin the pin on the chip before soldering the (tinned) wire to it. Pin 25 is the MCU side of the WE trace we severed earilier. It goes to WE in on the RTP board.
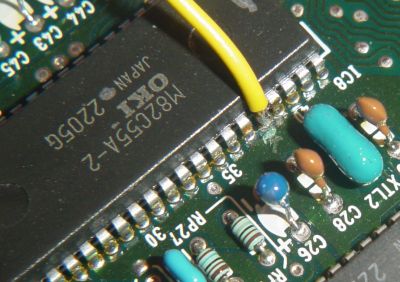
- The final connection goes to the other side of our severed circuit. This allows the RTP board to decode the addressing and enable the writes to the NVSRAM only when the A15 line is high. This can be soldered to pin 38 of the M82C55A chip.
- Finished product. Ready to run out and test:
- Now in the beginning of this article we spoke of being able to undo our modifications... If you recall we cut the WE circuit but then redirected each half to pins 1 and 3 on the RTP board so it's onboard addressing could allow the MCU to write to the NVSRAM and only the NVRSRAM. Well restoring this back to "stock" is as easy as making a dummy plug that connects wires 1 and 3 (orange and yellow here) together. Of course then you can put in your standard chip.
- After You done all the RTP componnent to the ECU, You guy will need the Rs232 to TTL converter to communicate the ECU to the PC. Go to the Dataloging section for more info
-- Lego Z81? - 30 Jul 2004 -- 10:45a
For JDM ECU's
A15 line on the surface mount m66207 is pin 17 (on DIP it is pin 16)
WE (WR by Oki's notes) on the m66207 is pin 27 (on DIP it is pin 25)
WE (WR by Oki's notes) on the 82c55 is pin 40 (on DIP it is pin 38)
Pinouts are here:
m66207
82c55a
|
Copyright © 2002-present by the contributing authors. All material on this collaboration platform is the property of the
contributing authors, and is covered by the Non-Commercial Share-Alike License unless explicitly stated otherwise. |
|