Browsed by
Tag: Honda

Removing a Broken Exhaust Manifold Stud: The MCN Tutorial

Removing a Broken Exhaust Manifold Stud: The MCN Tutorial

A while ago I had to deal with a broken exhaust manifold stud. To say it was annoying is to seriously understate my feeling on the matter. Rather than dwell in my own misery, I decided to come up with a do-it-yourself solution so some poor sap in the future may have an easier time than I did. I spent about 6 weeks thinking about the solution that did not entail me removing the head, plunking down my $75 at the machine shop, and another $100 for all the gaskets to put the head back on. So without further adue, my tutorial on how to fix a exhaust manifold stud disaster.

This post is about removing a stud without damaging your aluminum cylinder head. Some may say it can’t be done with the head on the car, and in some cases, that may be correct. However, I plan to show how to remove a broken exhaust (or intake manifold) stud without a trip to the machine shop and the cost of a new head gasket and headache and all that.

First, a parts list:

  • Electric or pneumatic drill
  • 90 degree angle adapter for the drill, if necessary
  • 1x 5/32 cobalt drill bit, Cobalt is the metal it is made of, not the brand.
  • 1x internal pin-type concrete anchor, AKA concrete “Strike Anchor”
  • a bench grinder or other heavy duty metal grinder.
  • 1x 5/32 square tapered screw extractor
  • small hammer
  • crescent wrench

First of all, some notes about the parts list. You must have something to drill with, so obviously an electric or pneumatic drill is a necessity. Unfortunately, most electric drills will not fit, so you will need to buy a right angle adapter for the electric drill, pictured below. You may also be able to substitute a 90 degree angle die grinder if you can find cobalt metal bits that fit it, but in my experience, that is a chore.
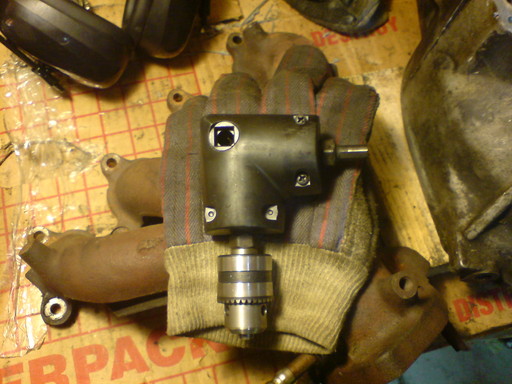
Right Angle Drill Adapter

Second, the drill bit is of the utmost importance. Don’t even bother with the wood/metal/all purpose drill bits, because they are just a waste of time. You want to buy a drill bit that is made of cobalt metal, i.e. the chemistry element cobalt. This is the most critical part you should buy. Without this bit, it won’t happen. I spent 5 hours, first with an “all purpose” wood/metal bit, then went to a “titanium coated” bit, then a carbide bit, all of which didn’t do the job in any way, shape, or form. After 3 trips to the store, only a call to my master airline mechanic father-in-law, did I discover that Cobalt metal drill bits are the name of the game for things like this. So seriously, don’t even bother without one. They are about $5 at sears.
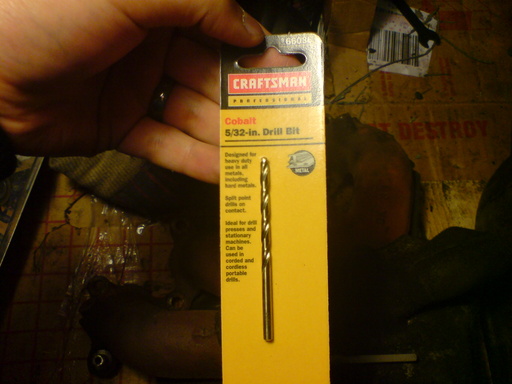
Cobalt Metal Drill Bit

Third, you need this particular style of “Strike Anchor” concrete anchor from whatever hardware store you can find:
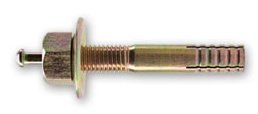
Concrete Strike Anchor before grinding

Fourth, this method may not be possible without a bench grinder. you may be able to get creative and use something else, but a bench grinder makes life really easy.

Finally, you are gonna need a cheap $3 screw extractor. It is a square pin with serrations that bite when turned counter-clockwise.

Screw Extractor
Screw Extractor

Procedure:

Our first objective is to make a metal sleeve for the drill bit to force the bit to the center of the stud. This is to ensure that the drill bit goes through the stud and not your cylinder head. To do this, you need to take the concrete anchor described above, and remove the pin from the center of it, as well as the nut that may or may not be on it. Then, using a bench grinder, or alternatively, a hack saw, cut the anchor in half. We just need the top side of the anchor with the threads on it, the bottom side can be discarded. Next, you need to grind down the outer shell of the anchor until it fits snuggly into the hole of the exhaust manifold. If you have your exhaust manifold off, now would be a good time to attach it with as many studs as possible that are still intact. This step is necessary,because without the exhaust manifold attached, the sleeve we made for the drill bit cannot be used. Below is an example of the sleeve, as well as how we plan to use it:
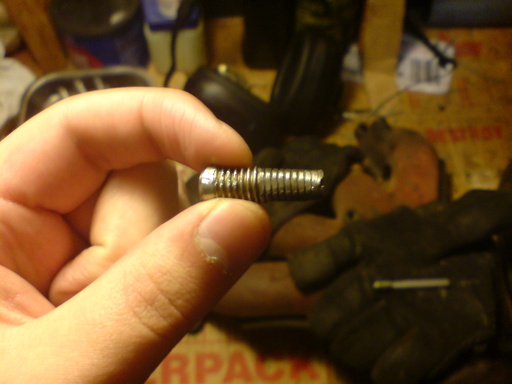
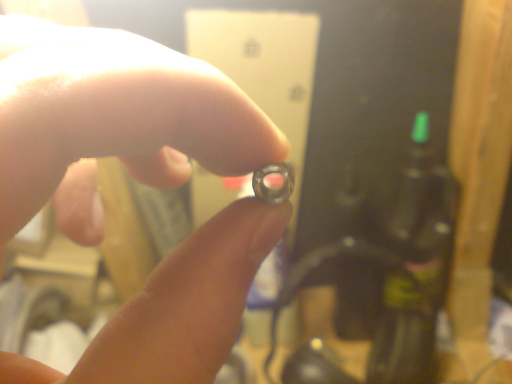
Concrete Strike Anchor After Grinding pic 1
Concrete Strike Anchor After Grinding
Concrete Strike Anchor after grinding pic 2
Concrete Strike Anchor after grinding Pic 3

Next, if you have enough clearance to insert the drill bit into the bit guide we made from the anchor without the bit guide and the bit having to be put on at the same time (test it out) then lightly tap the drill bit guide into the exhaust manifold hole where the stud used to go. If there is not enough clearance to insert the drill bit guide and then the drill bit separately, then simply put the sleeve over the bit and insert both at the same time, being sure that the drill bit guide is a snug fit into the exhaust manifold stud hole.
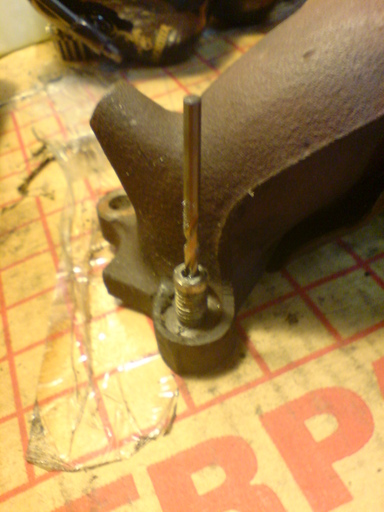
Drill bit inside bit guide tube

Now, as long as you are confident that the drill bit guide you made snuggly fits the exhaust manifold stud hole, then this is the moment of truth. With your 90 degree angle adapter for your drill attached, and the cobalt metal drill bit, with the drill bit guide over the drill bit, make sure once again that the sleeve is inserted snugly into the EM. If all of those things check
out, then start drilling a tiny test hole to verify the drill bit angle.

If the first pilot hole is successful, then set up the rig again and drill a hole through the stud. This should take no more than about 45 seconds of drilling to get through the stud. You should feel the drill bit sink in really fast (since you are using the cobalt drill bit..), which will then be your indication that you are through the stud. At this point, keep the drill rotating in the clockwise(drilling in) direction and slowly remove the bit, as this will ensure that the bit does not break in the stud, and also evacuate most of the shavings created going through the stud. Congratulations, you now have a relatively straight hole through the stud, thanks to the sleeve you constructed.

Now, remove the sleeve and use the screw extractor and the hammer to lightly tap the screw extractor into the hole we made in the stud. Once it is securely in the stud, use a crescent wrench to wind the screw extractor in the counter-clockwise direction. This is not the time for power tools, because we don’t want the screw extractor breaking inside the stud. If you did everything correct, then the broken stud should start to wind its way out. If you suspect the stud might be rusted in or something, before using the screw extractor, spray some wd-40 or rust eater or other penetrating oil into the hole and then come back the next day to do the screw extractor step.

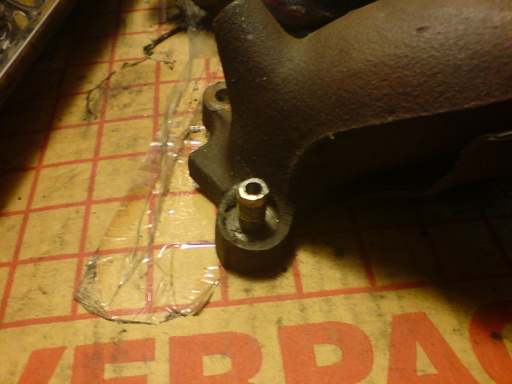
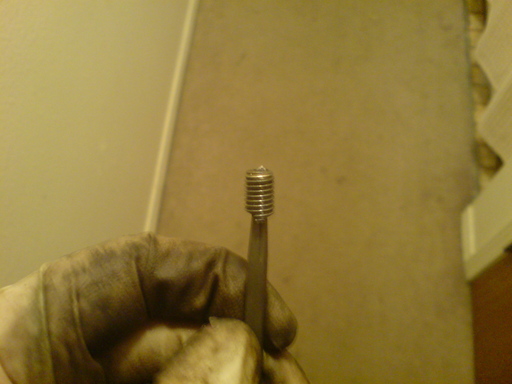
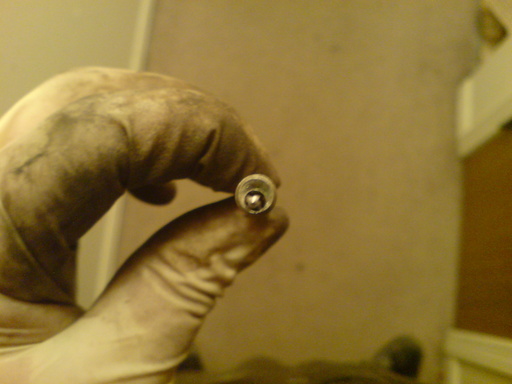
If all goes well, you should have something that looks like this:
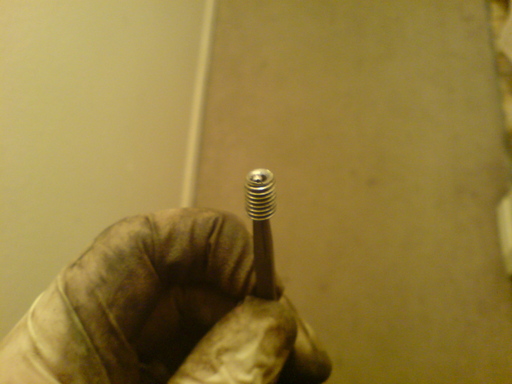
Success Picture 1
Success Picture 1
Success Picture 2
Success Picture 2
Success Picture 3
Success Picture 3

You will notice that in the image above, I managed to drill a nearly perfectly straight hole through the broken portion of the stud, thanks to the sleeve I constructed from the upper portion of the concrete anchor. I didn’t even knick the cylinder head threads at all, and the new stud went in like nothing happened. This method works only on studs that have broken off inside the head, with no portion exposed to the outside. Good luck!

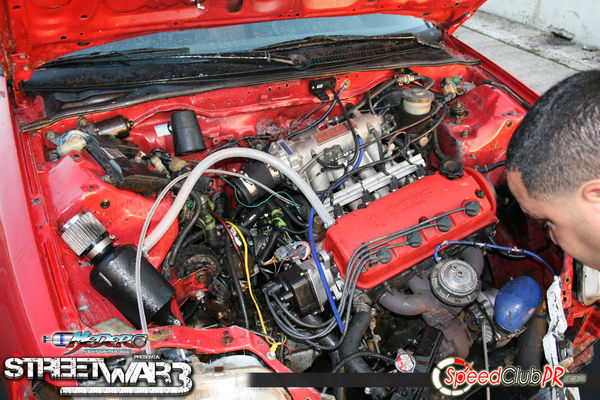
CRX flywheel explodes, Carnage ensues.

CRX flywheel explodes, Carnage ensues.

I remember a conversation I had with my father-in-law many years ago about SFI ratings. The topic came up because I was putting a 7lb flywheel in my car, and happened to notice the sticker strongly affixed to the flywheel and the corresponding clutch stating the parts were SFI certified. I wasn’t very familiar with what that meant at the time, and the explanation was that it is a rating and standardization body that supports the automotive industry, and a company who pays particular attention to racing parts.

The story I got was : “Back in the old days, flywheel explosions were common and fire suits and other safety gear were not. The SFI came along and changed all that by inspecting manufacturing processes and materials used to produce performance parts and safety clothing. In other words, the sticker is a good thing.”

As I got more involved in vehicle performance, I became acutely aware of SFI ratings on certain parts, but one thing still stuck in the back of my mind: “Flywheel explosion?! that must be a hell of a sight.”

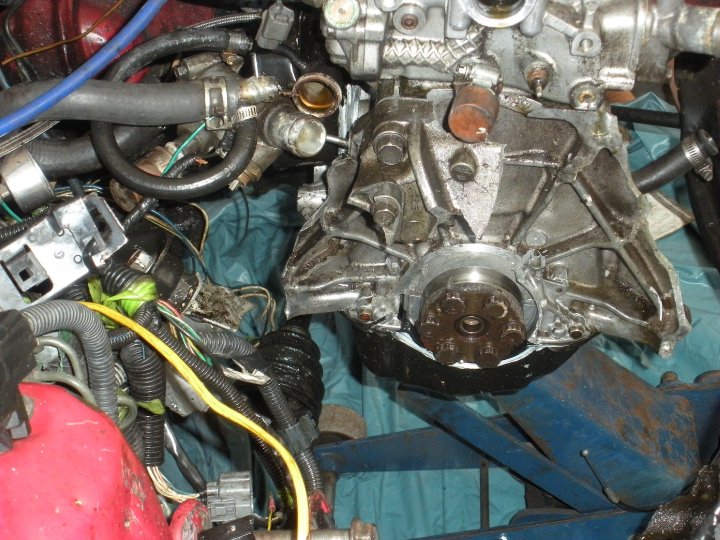
I have never experienced a flywheel explosion before, but what I found on Honda-Tech.com the other day changed all that. Here is the video:

[youtube n0TxZFDLa3w]

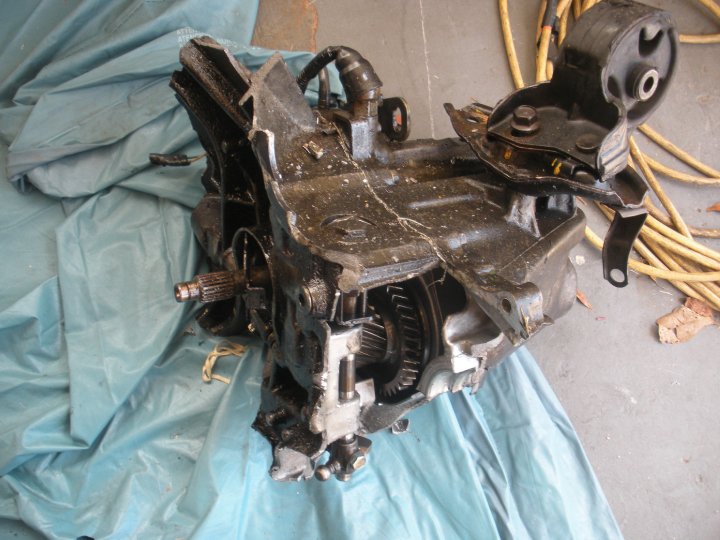
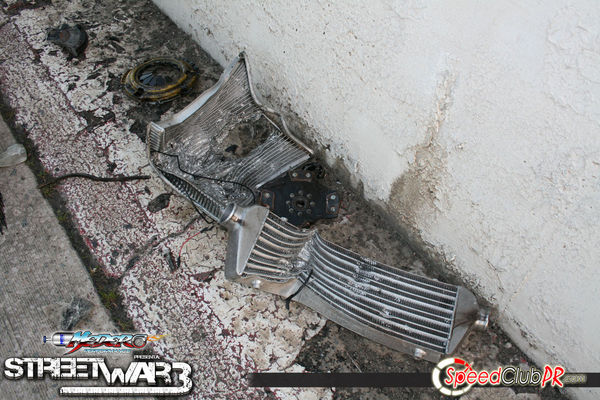
The following is what is left after a flywheel explodes in a 1991 Honda CRX, in pictures:

CRX Flywheel Explosion 1
CRX Flywheel Explosion 2
CRX Flywheel Explosion 3
Whats Left of the Transmission
Whats Left of the Transmission after the flywheel exploded
leftovers
leftovers
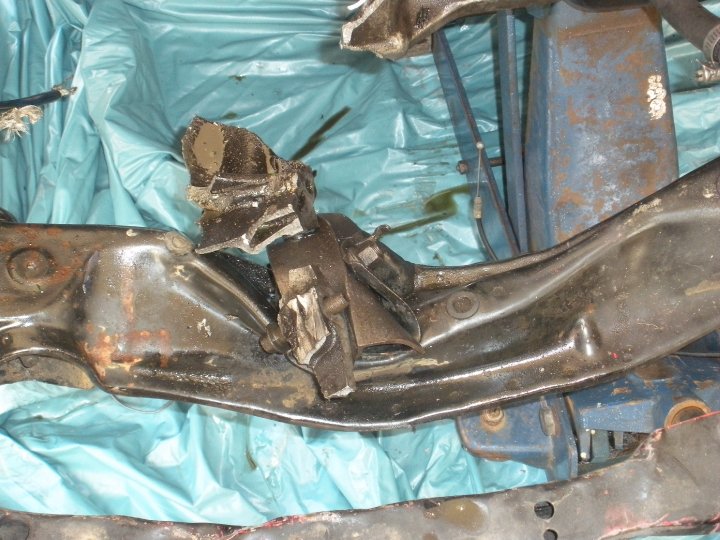
broken Transmission Mount

As you can see from the wreckage, this is a spectacular display of the potential energy stored in a flywheel. The bell housing of the transmission is totally gone, as is the flywheel housing on the engine side. Motor mounts were broken in half, and the radiator, intercooler, clutch pressure plate and clutch disc are completely destroyed.

Some speculation about the flywheel that was used is still going on at honda-tech.com, but my opinion on the matter is that it looks like the flywheel being used was a modified stock(!) flywheel. You can see in the “CRX Flywheel explosion 3” picture that the leftovers of the flywheel appear pretty dark, just like the stock flywheel. Were it an aluminum flywheel, there would be a much brighter silver color where the aluminum sheared apart, much like what you see where the aluminum engine and transmission were blown apart.

Anyway, I think I will be spending my $100 summit racing giftcard toward a scatter shield..

source: honda-tech.com via SpeedClubPR.com

How does a Phantom Grip Limited Slip insert REALLY work?

How does a Phantom Grip Limited Slip insert REALLY work?

For a while now, I have been wondering how a Phantom Grip Limited Slip open differential conversion works. I have read often enough on Honda-Tech.com about how “Phantom Grip LSD’s don’t work” or “cause excessive metal shavings in the transmission oil”, and other horror stories. Never the less, lots of people are lured into buying them because “they are so much cheaper than a normal LSD”. Well, after reading this post on Honda-Tech, I decided to write this entry to study the problem and document the thought process. Hopefully you will understand the fundamentals of how a Phantom Grip Limited Slip insert works by the end of this article, and will be able to decide for yourself whether it is worth the money.

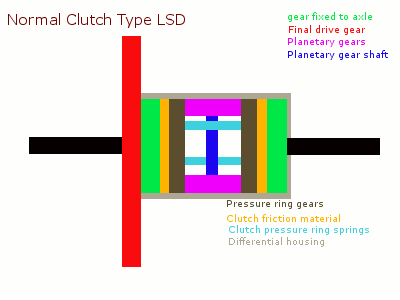
For this explanation to work, it helps to have some insight into how an LSD mystery box works. In this case, we will discuss a clutch-type LSD since this is the style of LSD the Phantom Grip purports to be closest to. But first, a picture for reference:

Diagram 1: This is a basic layout image of a FWD Clutch Type LSD

A Clutch-Type Limited slip differential works by using a high friction clamping surface(orange in color), sometimes many plates with high friction surfaces, to resist independent motion of the gears fixed to the axles(in green), and thus causes the front wheels to spin at the same speed. This independent motion can be caused by driving through a corner, where the outside wheel spins faster than the inside wheel, or often also by torque steer. If you go into a hard left corner, the left side axle (in black, attached to the green) will be spinning slow with not very much load on it, and the right side will be spinning faster with lots of load on it. This causes the clutch friction material on the left side to break free and rotate the pressure ring gear on the left side at the same rate as the pressure ring gear on the right side, but since the gear fixed to the axle on the left side is not attached directly to the pressure ring gear on the left, it simply overcomes the friction material’s resistance, and is allowed to spin.

Torque steer is particularly common in front wheel drive cars, where one drive axle is longer than the other, causing different amounts of torque to be applied to each wheel. This high friction surface still allows the wheels to turn independently of each other, but is not nearly as willing to allow this because the high clamping force imparted on the friction surface by the internal springs (baby blue color) of the differential. This willingness to spin both sides at different rates in the clutch type differential is significantly less than the willingness to allow both sides to spin at a different rate that an open differential normally allows.  The consequence is that if you do a burnout in a open differential car, and turn the wheel slightly, you may end up with one wheel of fury, while the other wheel is just hanging out. The clutch type differential can help greatly in using the traction of both tires during a burnout, even at a higher than 0 degree steering angle, and it is all thanks to the calibration of the clutch friction material and the pressure exerted on the pressure ring gears by the clutch pressure ring springs.

Careful engineering is performed to find a good balance between friction surface area and spring strength, so the differential is not locked all the time, but not so weak that it acts as an open differential.

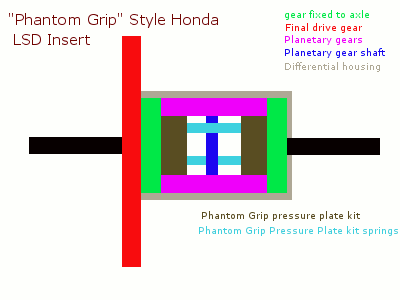
Next, a diagram of a stock Honda FWD differential with the “Phantom Grip Limited Slip” insert:

Diagram 2: This is what a Phantom Grip Limited Slip insert in a Stock Honda FWD "open" Differential looks like.

As you can see from the diagrams, right off the bat, calling a Phantom Grip insert a clutch type differential is not entirely true, because there is no clutch friction material(orange in color, diagram 1) as there is in a normal clutch type differential. In fact, there are several parts that appear absent in comparing diagrams 1 and 2.

You may also note that the clutch type LSD has pressure ring gears (brown in color, diagram 1) driven by the planetary gear system(purple in color, diagrams 1 and 2), where as the Phantom Grip planetary gears are simply the planetary gears provided by the OEM manufacturer of the open diff.

This brings the next question: If the Phantom Grip has no clutch friction material, and the pressure ring component is  a gear already being driven directly by the planetary gear system, then how does it work?

It appears that the Phantom Grip Limited Slip insert is only capable of providing friction on the gears driving the axles, which attempts to keep the wheels moving at the same speed.  It is important to note that the springs (baby blue in color) in both diagrams are providing some large force  in the direction of the gears connected to the axles. In a normal clutch type differential, this force increases the clamping force of the clutch plates much in the same way as a higher clamping load clutch helps a high horsepower car’s clutch not slip when the clutch is dumped. The Phantom Grip Limited Slip insert is imparting force via a spring in the same manner, but that clamping force is being exerted on the gear hub and the face of the axle gears! There is no friction material, and no set of flat side gears for a friction surface at all. In fact the total friction surface area provided by the stock open diff, all together,  is probably less than 1 inch square. Unless the springs in the device provide tens of  thousands of psi of force, it is unlikely that this device would do anything at all.  This is astonishing!  A quick look at an installed Phantom Grip Limited Slip insert shows how small the axle gear to limited slip insert contact surface must be.

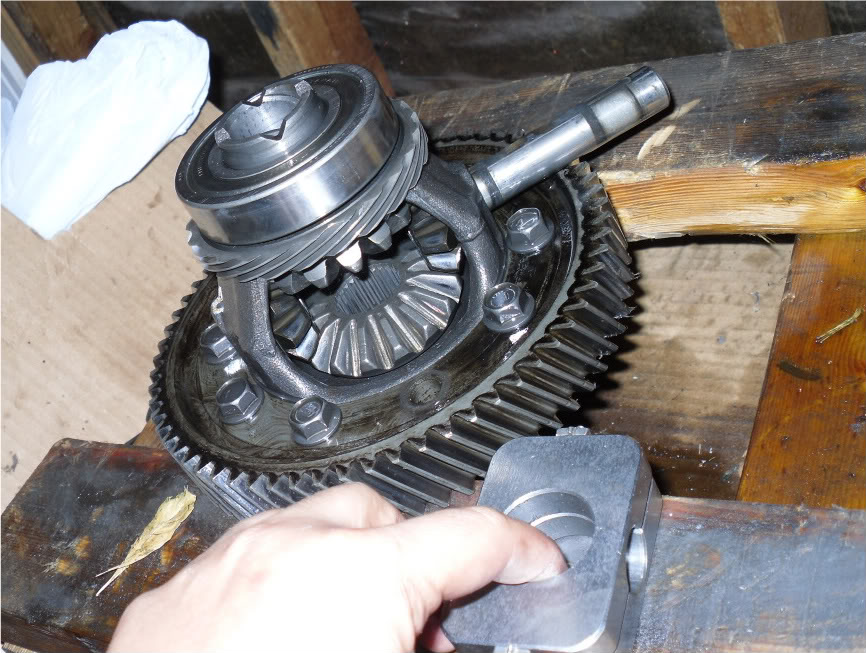
Phantom Grip Installation Contact area
Diagram 3: As you can see in this picture, the top and bottom of the metal box (Phantom Grip Limited Slip insert) in the hands of the installer will impart friction on the internal axle side gears of the open differential.

Diagram 3 above makes a big case for what shows up below. You notice that in the gears that are attached to the axle, the gears are sloped downward, while the Phantom Grip plate is flat. You will also note that the contact patch is a steel gear to aluminum or steel Phantom Grip plate contact, which when covered in transmission oil, can’t possible impart that much friction on the axle gears, even with monster springs.

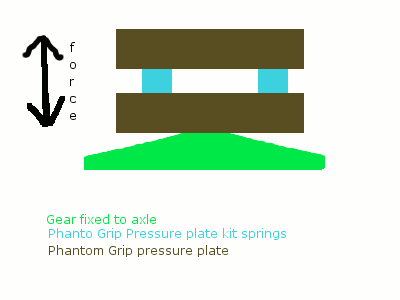
In the following picture, Diagram 4, you can see that the theoretical surface area of contact for the Phantom Grip limited slip insert on the tapered gear that is fixed to the axle in green is miniscule. The drawing below is not to scale in any sort of way, so the angle of contact may be more or less shallow, but it illustrates just how much different the Phantom Grip Limited Slip insert is from a real Clutch Type limited slip.

Diagram 4: Theoretical side view of the Phantom Grip contact plate to axle gear

It may now be obvious how metal shavings will most likely wind up in your oil using the Phantom Grip. The friction plate of the device itself is resting on gears that don’t necessarily spin incredibly fast or for long periods of time, but they do spin, and over time, it is easy to see how the friction plate of the Phantom Grip may be worn down due to the tiny contact patch and heavy load on that patch. Real clutch type LSD’s have wearing issues of their own, but are engineered from the beginning for the purpose of acting as a clutch.

So with that, we come to the end of this post. A few unknowns are left for me to ponder, such as the actual, real contact area the Phantom grip has in a normal Honda open diff, and also what exactly the spring pressure is in the limited slip insert. These factors can make a difference in how well the device works, but in my opinion, this short explanation is enough for me to determine that I will absolutely spend the extra $400 or $500 for a real clutch type or helical LSD over the Phantom Grip Limited Slip insert.